Openterface Mini-KVM (Windows) — Hardware Diagnostics Self-Check Guide
This guide explains how to run the Hardware Diagnostics self-check in the Windows version of the Openterface app, and how to send the diagnostic report to support if an issue is detected.
Before you start
- Update the app: Ensure you have the latest version of the Openterface Windows app installed before running diagnostics. Check the app menu for updates.
- Connect Mini-KVM to both Host and Target.
- Keep the target device idle during testing (especially during Stress Test).
Important (Windows): The diagnostics does not auto-advance.
To move between tests, use Next (bottom bar) or click a test item in the left panel.
Each test is executed by clicking Check Now.
Working Unit (PASS)
Step 1 — Open Hardware Diagnostics (Windows)
In the Windows Openterface app, open: Advanced → Hardware Diagnostics.
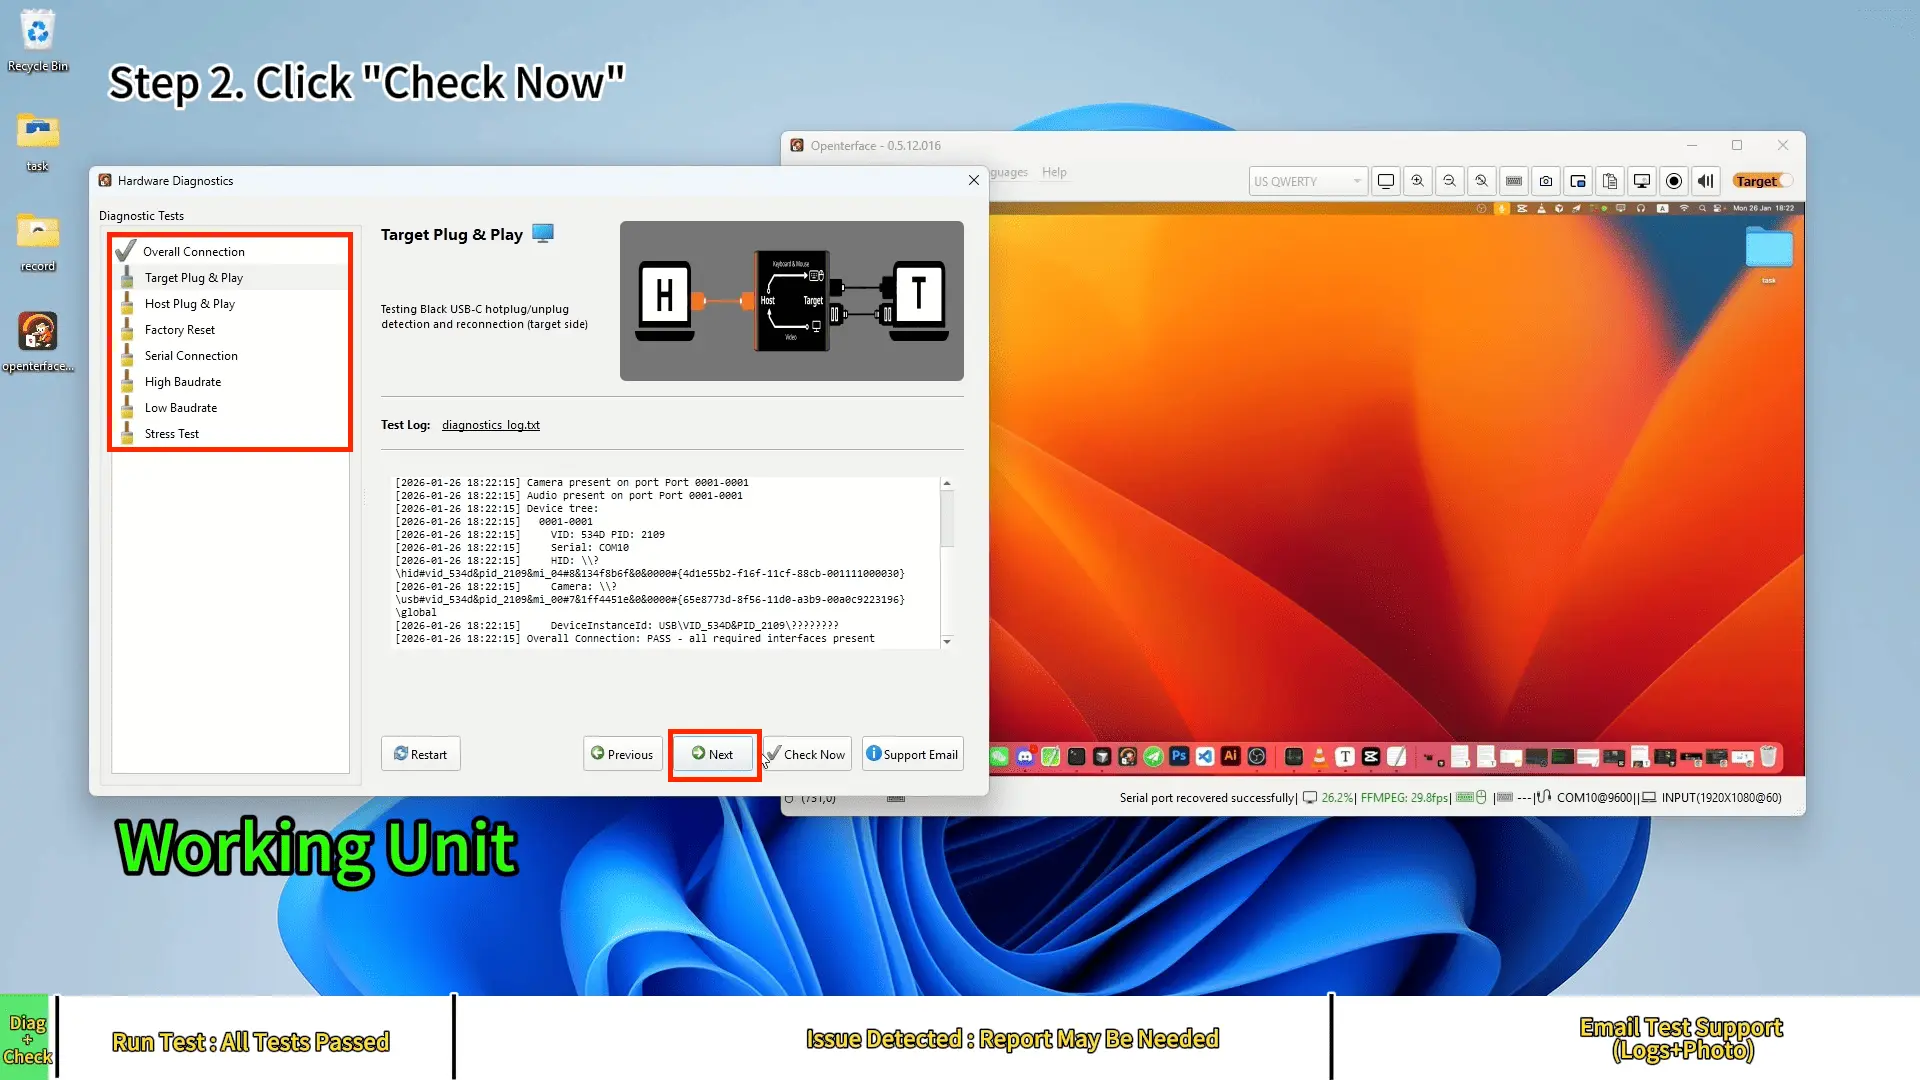
Step 2 — Run the self-check
In the Hardware Diagnostics window, click Check Now to run the current diagnostic step.
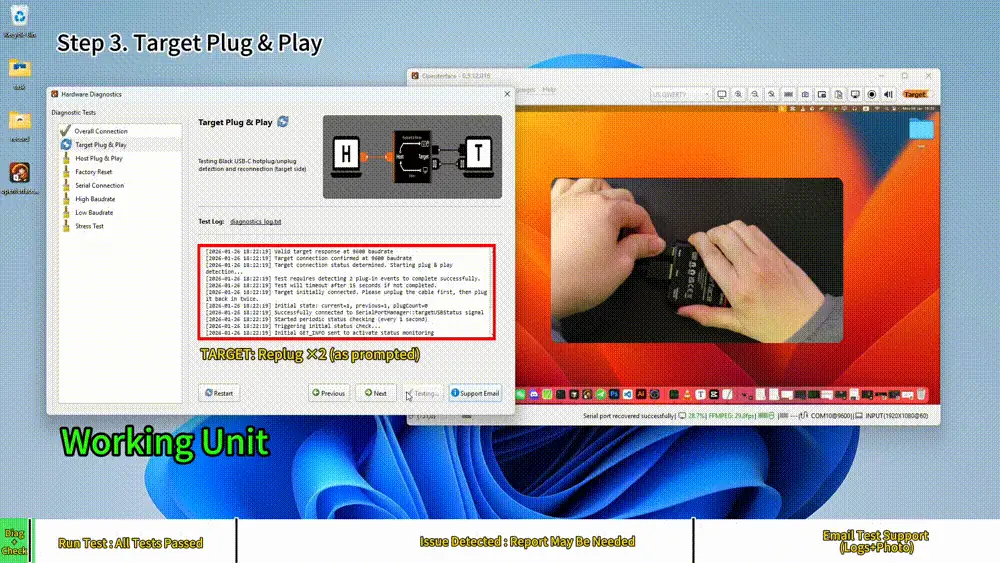
Step 3 — Target Plug & Play (follow the prompt)
When Target Plug & Play asks you to reconnect the target cable, follow the on-screen instructions.
Some setups may ask you to unplug/replug more than once (e.g., twice).
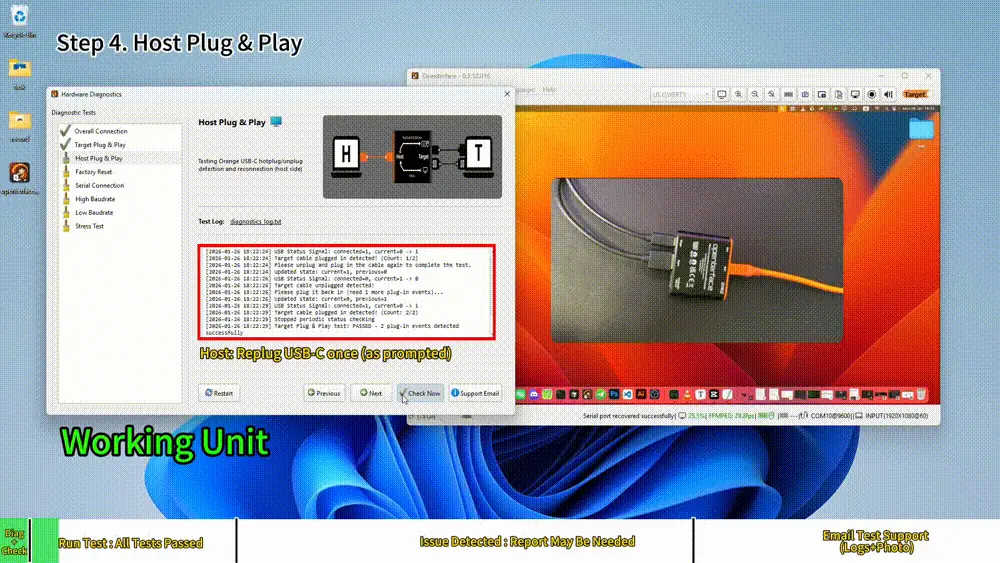
Step 4 — Host Plug & Play (follow the prompt)
Follow the on-screen instructions for the host side.
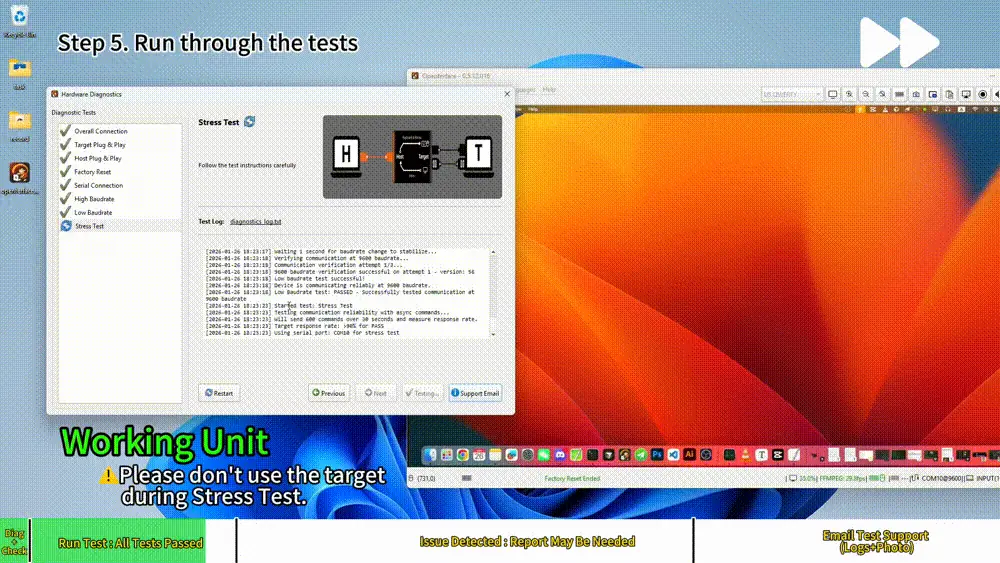
Step 5 — Stress Test (hands off the target)
During Stress Test, the target mouse may move automatically for detection.
Do not operate the target while the test runs.
Note: Mouse may move quickly — don't touch the target.
Step 6 — Confirm PASS
Continue until the self-check completes. If everything is normal, the results will show PASS / All Tests Passed.
Issue Detected (Keyboard/Mouse Example)
If an issue is detected, one or more items may show FAIL.
Step 1 — Run the same Hardware Diagnostics
Open Advanced → Hardware Diagnostics, then click Check Now to start.
Step 2 — Continue through the checks
Continue through the remaining tests until the diagnostics finishes.
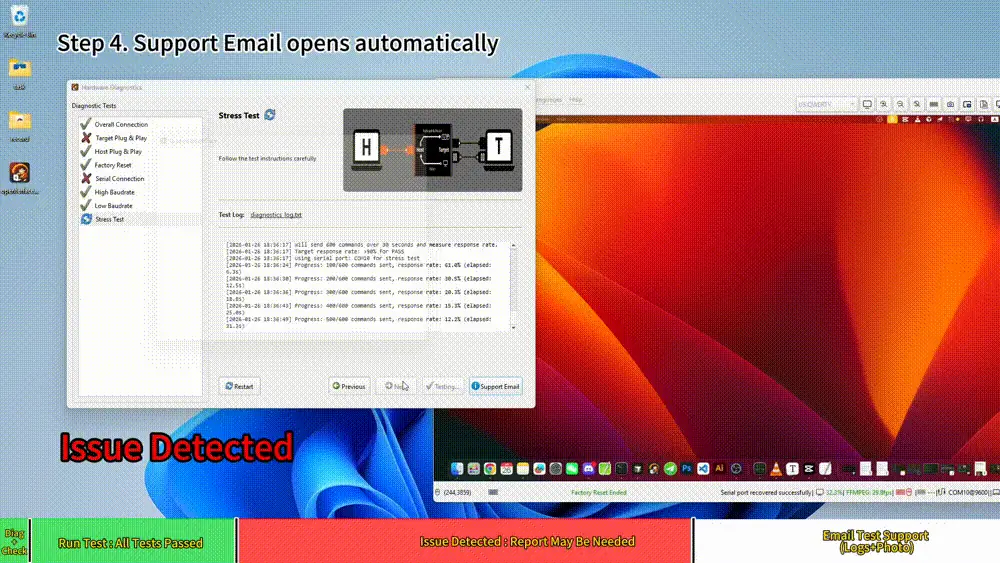
Step 3 — Support Email opens automatically
When the diagnostics finishes with an issue, a Support Email window will open automatically.
Sending logs to Support (Windows)
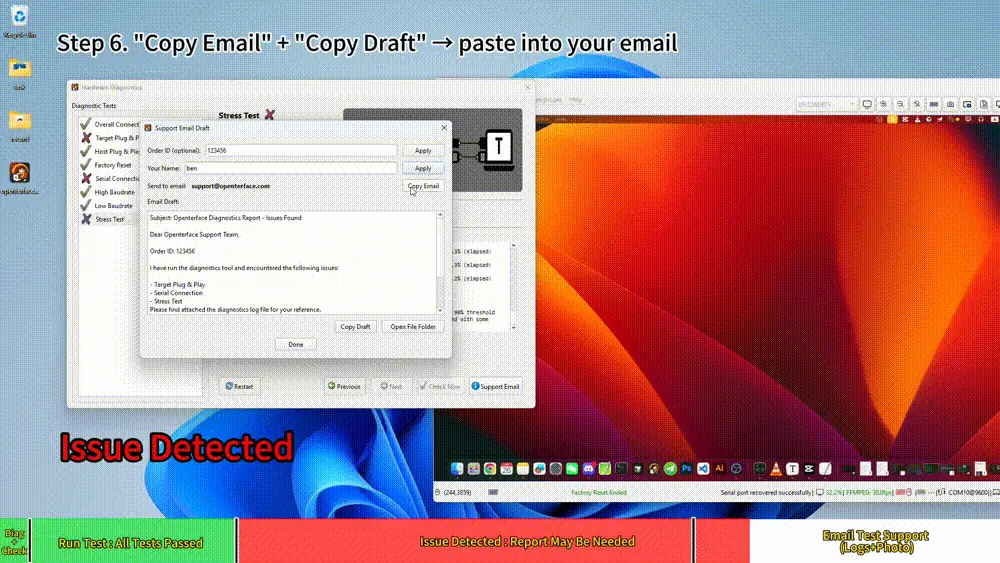
Step 4 — Apply Order ID + Name
Enter your Order ID and Name, then click Apply to insert them into the email draft.
Step 5 — Copy email address and draft
- Click Copy Email to copy the support email address.
- Click Copy Draft to copy the pre-filled email content (including Order ID + Name).
Paste both into your email client (Gmail/Outlook/etc.).
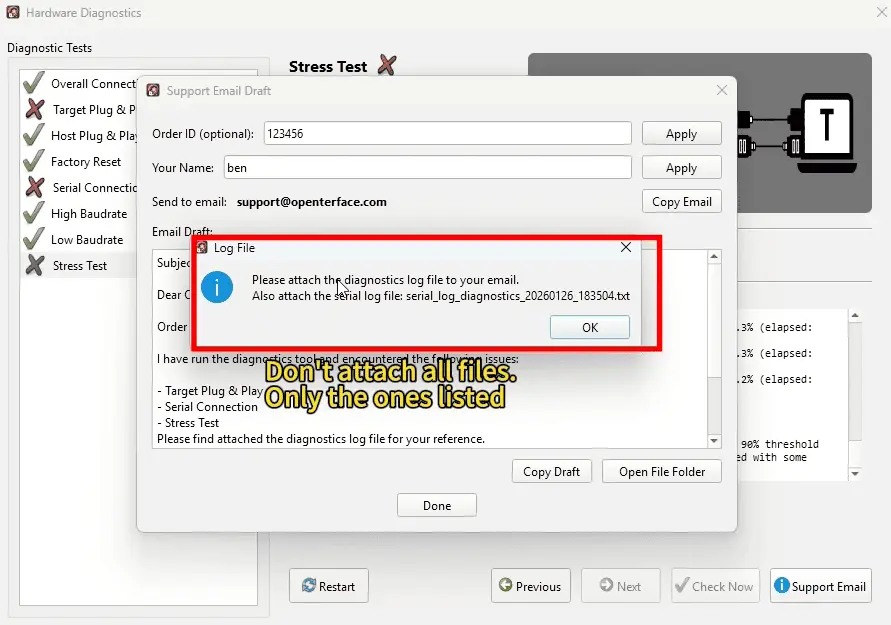
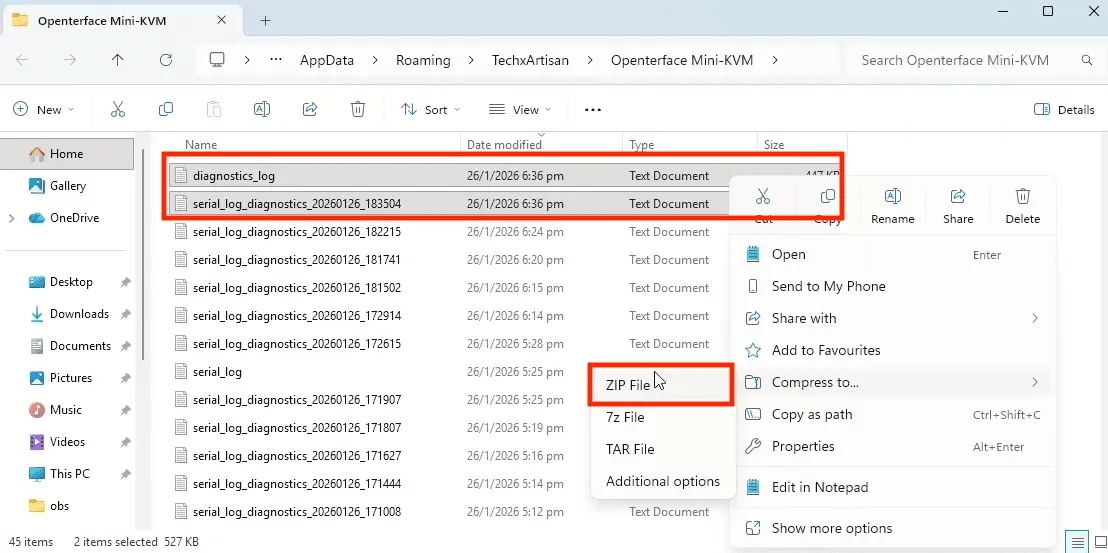
Step 6 — Attach the correct log files
Click Open File Folder. The tool will indicate which files to attach.
Attach only the requested log files (the folder may contain many other logs).
Step 7 — Also attach a setup photo
In the same email, attach a clear setup photo showing: - the Mini-KVM device, - both Host and Target connections, - ports and cables clearly visible.
Step 8 — Send the email
Send the email to support (draft text + requested logs + setup photo attached).
What to include when contacting support
- Order ID
- Requested diagnostic log files
- Setup photo (Mini-KVM + host/target wiring)