Openterface Mini-KVM - Diagnostic Self-Check Guide (macOS)
This guide provides step-by-step instructions for running diagnostic self-checks on the Openterface Mini-KVM device.
Before you start
- Update the app: Ensure you have the latest version of the Openterface macOS app installed before running diagnostics. Check the app menu for updates.
- Connect the device: Verify that Mini-KVM is properly connected to both Host and Target devices.
- Keep target idle: During testing (especially Stress Test), keep the target device idle and do not operate it.
Good Unit
Step 1: In the Openterface app, open Settings → Settings…
Step 2: In the Settings window, go to Advanced & Debug.
Step 3: Click Open Diagnostics Tool.
Step 4: When prompted, click Enable to turn on diagnostic logging.
Step 5: Click Check Now to start the self-check.
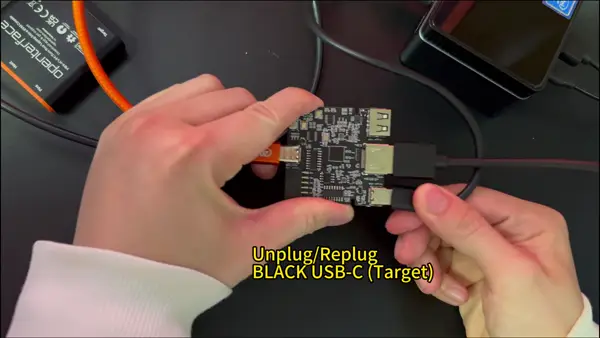
Step 6: Click Start Test, then unplug and replug the black USB-C (target side) when asked.
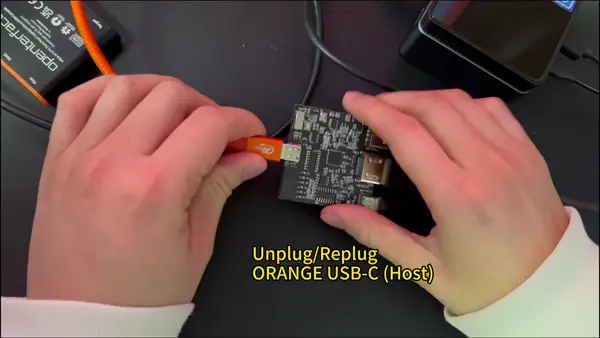
Step 7: Click Start Test, then unplug and replug the orange USB-C (host side) when asked.
Step 8: Click Start Test, and wait for the test to complete.
Step 9: Click Reset Now, and wait for it to complete.
Step 10: Click Change Now, and wait for the baudrate switch to finish.
Step 11: Click Start Test, then wait about 30 seconds. Do not operate the target while the test runs.
Note: Mouse may move quickly. Don't touch the target.
Step 12: Confirm all items show green check marks and the progress is complete.
Step 13: Click the ❌ (top-right) to close the Diagnostics window.
Issue Detected (Keyboard/Mouse Example)
Follow Steps 1–11 in "Good Unit" first. The notes below explain what you'll see when a keyboard/mouse issue is detected.
How this issue shows up
In this example, Overall Connection shows FAIL first because a target-side keyboard/mouse (HID) issue affects the overall check. This is an early indicator, not a separate issue. (You'll see the FAIL status highlighted next to "Overall Connection" on the left.)
- Overall Connection: FAIL is shown here first due to the target-side issue.
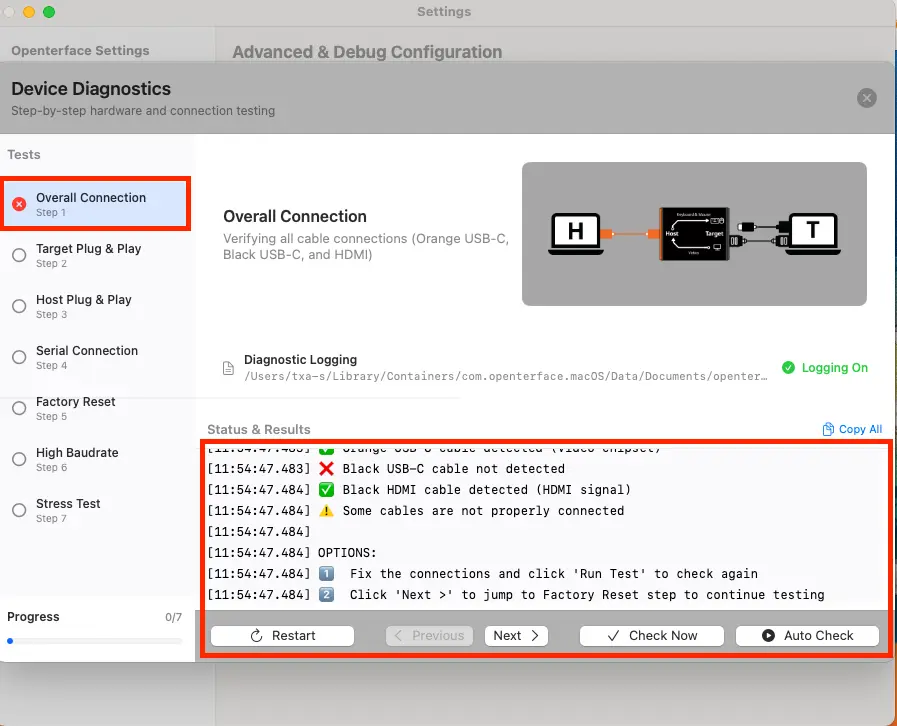
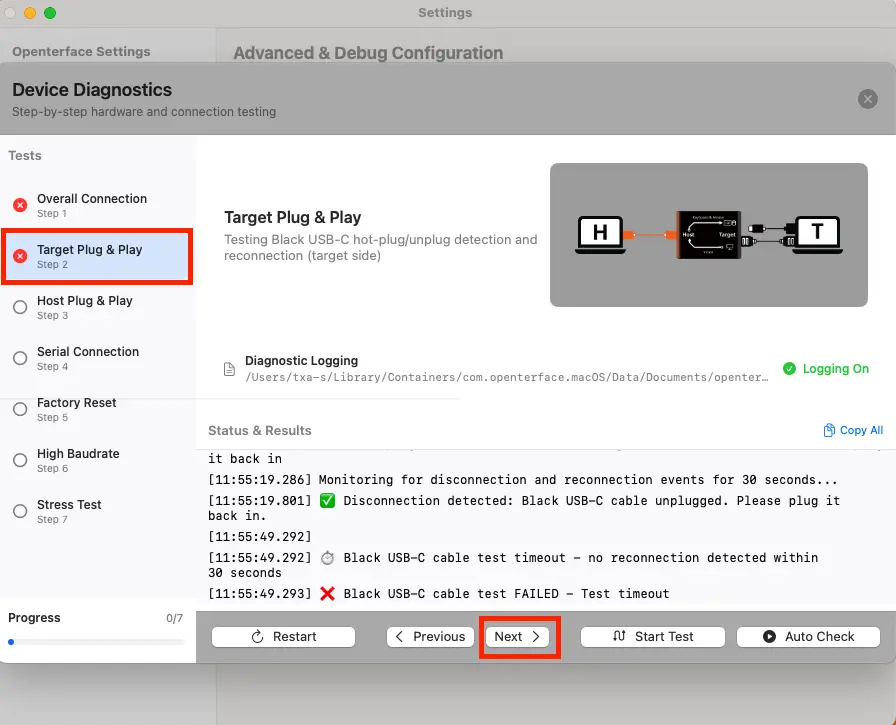
- Target Plug & Play: After running this step, the result can show the target-side problem more clearly.
Tip: If a step shows FAIL, the diagnostics will not stop, but it may stop auto-advancing—so you'll need to continue manually.
Extra final test (depends on the issue type)
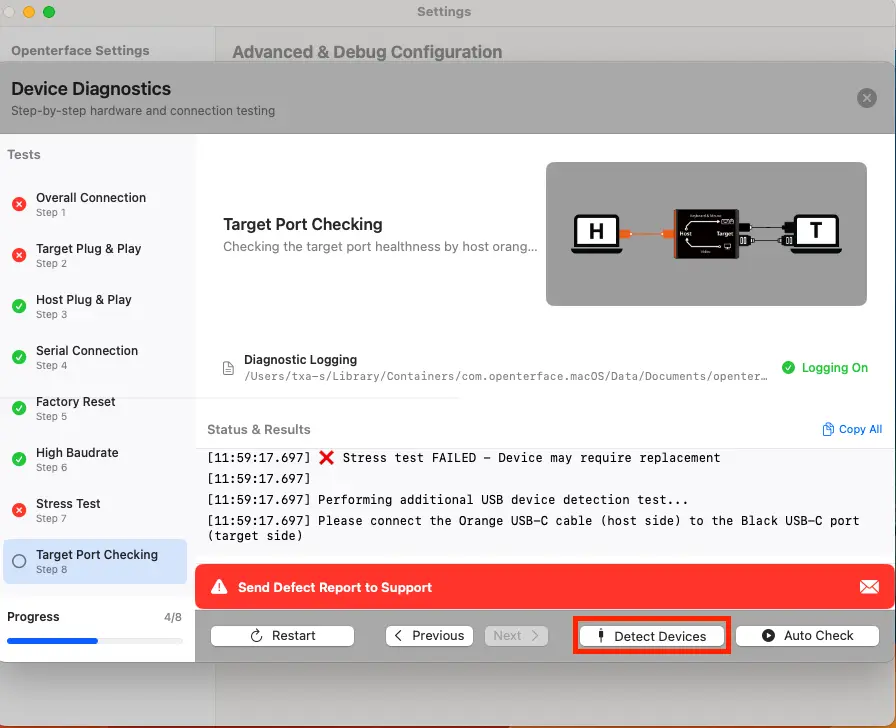
Step 12: After Stress Test, the diagnostics may show an extra final test depending on the detected issue; in this keyboard/mouse example, it continues to Target Port Checking.
Step 13: Click "Detect Devices" to start Target Port Checking, then follow the on-screen instructions.
What happens when an issue is detected
Step 14: To continue, click Next (bottom bar) or select the next test from the left panel.
Sending logs to Support
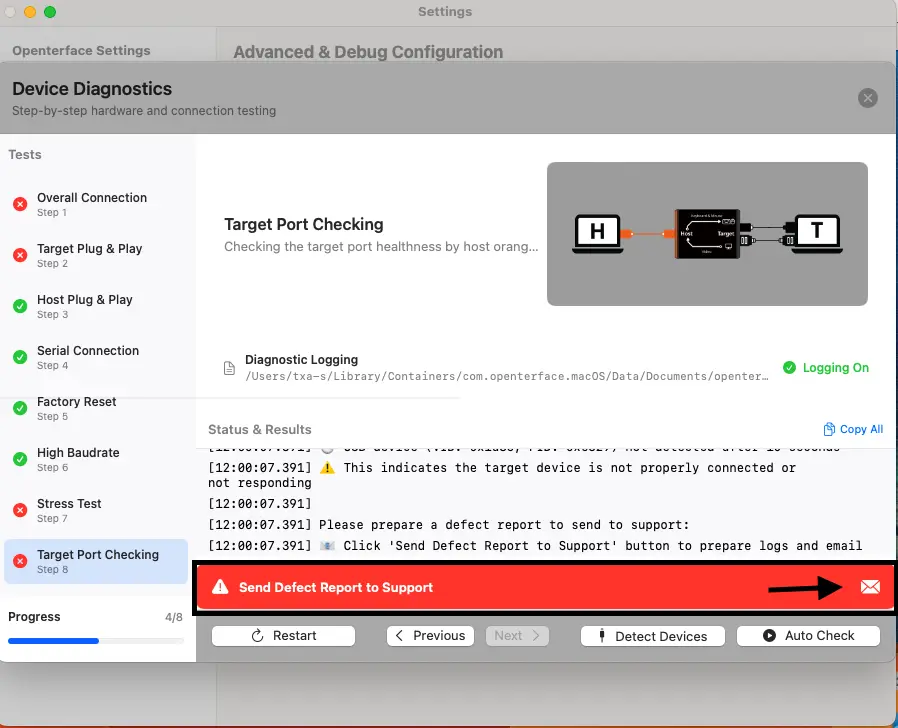
Step 15: Click Send Defect Report to Support to prepare the report for support.
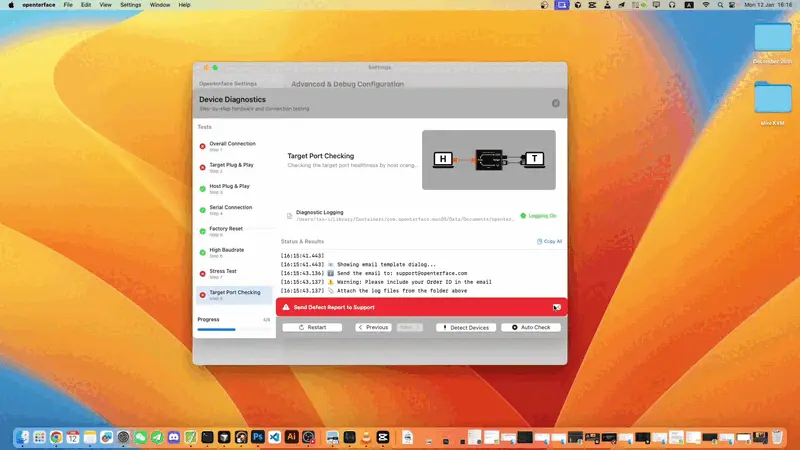
Step 16: In the Defect Report window, enter your Order ID and Name, then click Apply to insert them into the email draft.
Step 17: Copy the email address and draft: - Click Copy Email to copy the support email address. - Click Copy Draft to copy the pre-filled email content (including Order ID + Name). - Paste both into your email client (Gmail/Outlook/etc.).
Step 18: Click Open Log Folder. The tool will indicate which files to attach. Attach only the requested log files (the folder may contain many other logs).
Step 19: In the same email, attach a clear setup photo showing: - the Mini-KVM device, - both Host and Target connections, - ports and cables clearly visible.
Step 20: Send the email to support (draft text + requested logs + setup photo attached).
Step 21: Click the ❌ (top-right) to close the Diagnostics window.